
This article is available how to install TIS2000 on machines other than WinXP Pro.
Window 64bit or 32bit
64-bit versions of Windows contain backwards compatibility with 32-bit applications, but not with 16-bit applications. And 32-bit versions of Windows are backwards compatible with 16-bit applications. The problem with installing TIS2000 on newer machines is that, while the TIS2000 program itself is 32-bit, the installer and drivers are 16-bit. Therefore, you are able to install TIS2000 natively on ANY 32-bit Windows system. This will just work, without having to run anything in compatibility mode.
Install TIS2000 on Windows XP Professional, 32-bit
All of the Tech 2 software is intended to work with Windows XP Professional, 32-bit. It may be possible to use the software using another OS, but results are hit or miss. Broadly speaking, you will probably have good luck with a 32-bit version of Windows 7 and every step you move away from that OS towards current it’s going to be more difficult.
Similarly, all Tech 2 software is intended to be used over a physical serial (“COM”) port. It may be possible to use the software over a simulated serial port such as a USB to serial adapter, but results are hit or miss. There are a couple specific adapters that are generally considered to work better than others (perhaps someone would care to offer ones they have gotten working, and someone can update this post).
For the purposes of this tutorial, we are going to use Windows XP Pro 32-bit running directly on a PC with a physical serial port. What I have:
1Dell Vostro 320 – this is a c2010 all-in-one computer that still has native support for Windows XP and has a physical serial port. Mine has an Intel Core 2 Duo E7500 and 3gb of RAM – it’s way more than the Tech 2 software needs but will work great.
2Dell Windows XP SP3 physical CD that I’m using to install XP fresh.
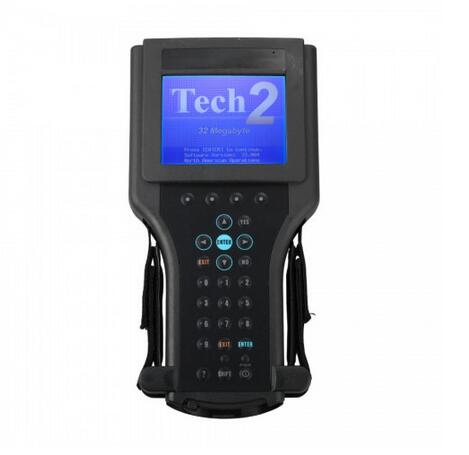
3Chinese Tech 2 Scan Tool, from No. 1 Auto Diagnostic via www.cnautotool.com.
4Three PCMCIA cards from the same place. Two are Saab-English 148 and one is GM-English 33.004
5A 16gb flash drive. (Believe me, you want this)
I need to assume you know how to install Windows XP on a computer. There are simply way too many variables to explain how to do this. If you don’t know how, there are lots of tutorials out there that can help you.
We are going to pick up right after you’ve done a fresh install of Windows XP on your computer. I would highly recommend you do this – picking up someone’s 10 year old computer and hoping it just works opens you up to world of pain – old anti-virus software, questionable Java installations, corrupted registries, blah blah. XP is old and stupid, you’re best served starting over.
As I write this, I am just finishing up installing Windows XP Pro SP3 on my Dell Vostro 320. When it’s done, the system will reboot and ask me some questions:
1.Do I want to change my display settings? Yes I do.
2.Do I want to turn on automatic updates? No I don’t, not right now.
3.My name? I like User, because it’s non-committal.
It’s then going to log me on. The first thing I am going to do is open Device Manager:
1.Click the Start menu
2.Right click on My Computer
3.Choose Properties
4.Choose the Hardware tab
5.Click Device Manager
and look at all the devices that have yellow question marks next to them, probably hanging out under Other Devices, indicating there are no device drivers. There are two things you are likely going to want to do:
1.Get a video driver installed so you can fully use the various Tech 2 applications and, most likely, WIS and EPC. If you have a Display driver called “Standard VGA” or an Other Device called “Video Controller” you are going to need a driver. For XP-era machines, there are going to be three main sources of video drivers – Intel, AMD/ATI, and Nvidia. You are going to need to know who you need to hit up to get your video driver. I probably can’t help you with that.
2.Make sure your chipset drivers are installed to ensure Windows is managing your chipset properly as otherwise, you could have serial port and USB issues. If you have a bunch of unknown devices called “PCI Device,” you’re probably missing some chipset drivers. As with the video drivers, Intel, AMD/ATI, and Nvidia are the common chipset manufacturers for the aughts. You need to know what chipset you have. I probably can’t help with that.
The rest of the stuff – things like sound devices and network devices, really aren’t important. In fact, to some degree, you really don’t want network devices working – that can potentially hamstring your Tech 2 experience and We The People of the Internet don’t need your dinosaur OS spreading viruses around the tubes. So, you’re in good shape not having network drivers installed.
If you have a Dell computer, getting drivers for your system is easy. Look on the back or bottom of your computer and find the 7-digit Service Tag. Alternatively:
1.Click the Start Menu
2.Click All Programs
3.Click Acessories
4.Click Command Prompt
5.In the black Command Prompt window that appears, type:
wmic bios get serialnumber
and press Enter.
6.After Windows installs wmic (it happens automatically) it will return the Serial Number of your PC, which also happens to be your Service Tag. (Yes, I am so lazy I’m not even going to turn this machine around)
ON A DIFFERENT COMPUTER:
1.Visit www.dell.com
2.Click Support -> Support by Product
3.Type in the Service Tag you just obtained
4.Click Drivers & Downloads
5.You will probably need to locate the option “Operating System” and choose “Change OS” to Windows XP
6.Stick that 16gb flash drive into the computer and start downloading drivers
7.Once the drivers you need are downloaded, take that 16gb flash drive into your DeLorean… I mean old computer, and install them one by one. It’s lots of fun!
I would also go ahead and disable Delayed Write for your USB drive via Device Manager:
1.Click the Start menu
2.Right-click on My Computer
3.choose Properties.
4.Click on the Hardware tab.
5.Click on the Device Manager button.
6.Find your in the list, probably under “Disk Drives.”
7.Right-click on the device and choose Properties.
8.Click on the Policies tab.
9.Uncheck Enable write caching on disk.
10.Click on OK.
Why do this? Because delayed writes on removable drives are annoying. While it’s on, you will need to “Safely Eject Hardware” every time you want to remove that USB drive. You’re going to be moving it around a lot, Ejecting every time gets old fast. Microsoft was smart and disabled delayed writes on Vista/7/8/10 by default… which is why you don’t need to Eject drives from those newer OSs. So, seriously, just disable it on your XP machine as well.
Be sure you finish up your installation with a reboot. It’s XP, it never hurts.
At this point, you should have a functional XP machine, c2008, so you have about seven years worth of updates to install. Fortunately, there is an easy way. Take your 16gb flash drive, plug it back into the other computer – the one with an internet connection – and go to
Scroll down a bit to the Windows XP Unofficial SP4 Download Locations and download it from Google Drive. Click the Google Drive link, locate the WindowsXP-USP4-v[whatever the current version is]-x86-ENU.exe file, right click on it, and choose download. It’s about 1gb, it will take a while.
Once it’s done, take that flash drive back to your time machine computer and get to installing. Remember, XP only supports USB 2.0 at best, so installation is going to take a while!
I’m going to do that now.
Install TIS2000 on Win 7
For those of you with genuine copies of Windows 7 Professional, Enterprise, or Ultimate with a multi-core processor (who doesn’t run Win7 on a multi-core these days); these versions of Windows 7 allow you to use Windows Virtual PC, which lets you virtually run Windows XP Pro without a disc or OS installation. You need to install Windows XP Mode and Windows Virtual PC in order to use it. Before you can download these updates, M$ makes you run a little .exe that checks if your OS install is legitimate. Anyway, after you get that all installed and XP Mode is booted, you can copy the OP’s cracked TIS2000.zip over to the WinXP Desktop and follow the README.txt inside to install it. Crack TIS2000 source:
I have tested this on my desktop running Windows 7 Ultimate 64-bit and the cracked copy of TIS2000 the OP posted installed and ran with no problems. Instructions for Win7 XP Pro virtualization mode here:
Install TIS2000 on Win 8
However, if you have a 32-bit copy of Windows 8 installed (I don’t wanna know why you do), running 16-bit applications are disabled by default. You can enable it by going to Control Panel and clicking on 16-bit Application Support then clicking Enable.