Diagnostic history function in LAUNCH X431 scanner (X431 V+, X431 PAD V, X431 PAD VII, X431 PROS) provides quick access to the tested vehicles and users can continue to the last operation without starting from the beginning. But sometimes we feel the diagnostic history is messy or we want to backup diagnostic history. So how can we clear diagnostic history or backup which folder for diagnostic history backup? Go ahead to see how to solve this problem.
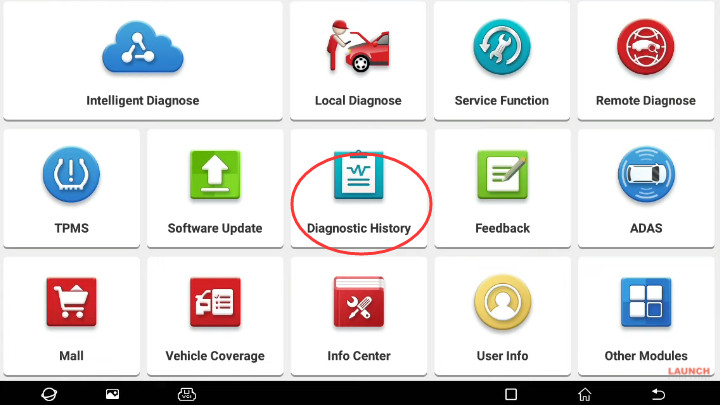
Step 1. Check ‘Diagnostic history’
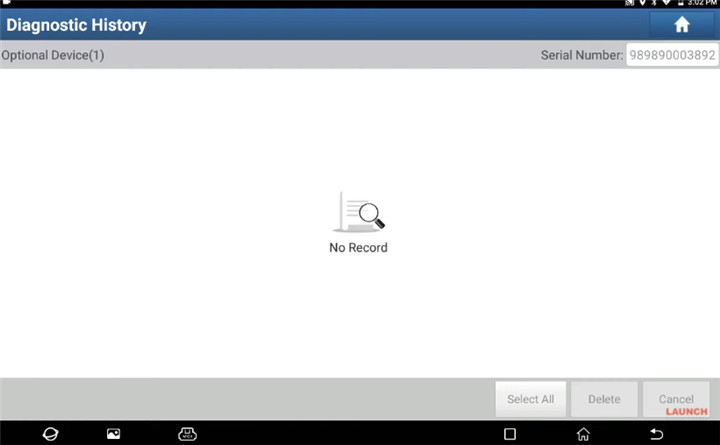
There is nothing in it at this moment.
Step 2. Select any vehicle to diagnose
e.g. VW Golf 2012
Select Local Diagnose>> VW>> System List>> 01 Engine Control Module 1>> Enter
There are three fault codes that have been detected.

Exit the system
Remove the VCI from the vehicle
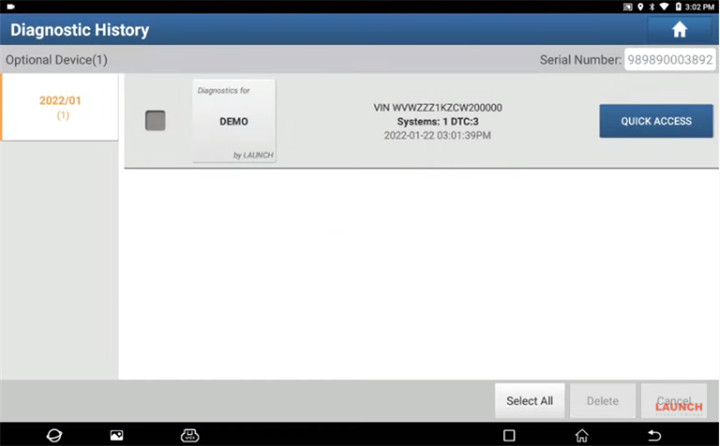
Step3.Check diagnostic history
Back to the main menu of Launch OBD2 scanner
Click ‘Diagnostic History’ to check again
Now you can see the VW diagnostic record appears on the screen
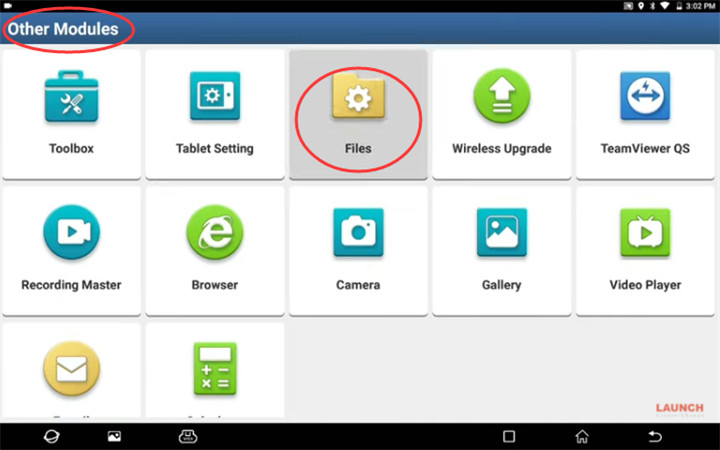
Step 4.Clear diagnostic history
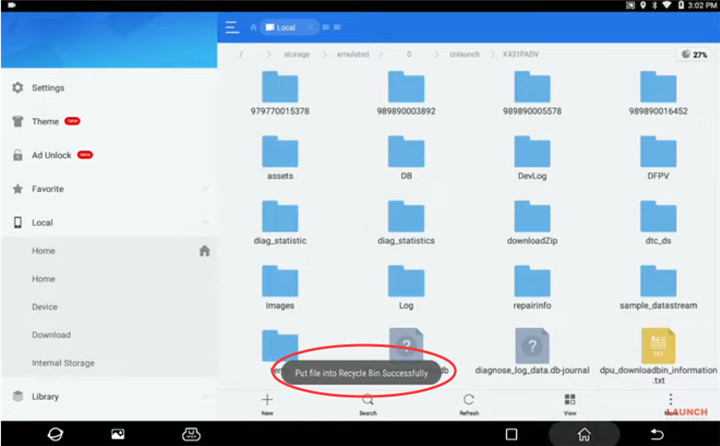
Back to main menu, select Other modules>> Files>> Internal Storage>> Logger>> the related file (cnlaunch)>> X431PADV>> DIAGNOSTIC

Move the folder DIAGNOSTIC to Recycle Bin
Put the file into the recycling Bin successfully
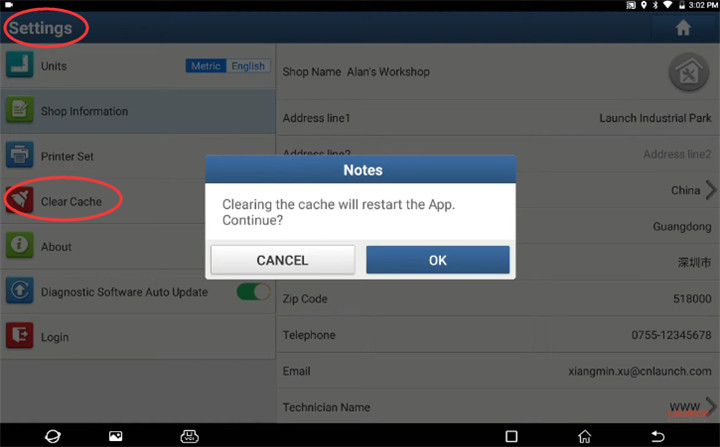
Step 5. Clear Cache s
Go to User info>> Settings>> Clear Cache
Continue to perform the function
After that, restart the APP automatically
Step 6. Check if the diagnostic history record has been cleared
Check diagnostic history again
It shows ‘No Record’.
So, the diagnostic history record on Launch scan tool has been emptied successfully.